_edited_edited_edited_ed.png)
Rosebuds Gift Boxes
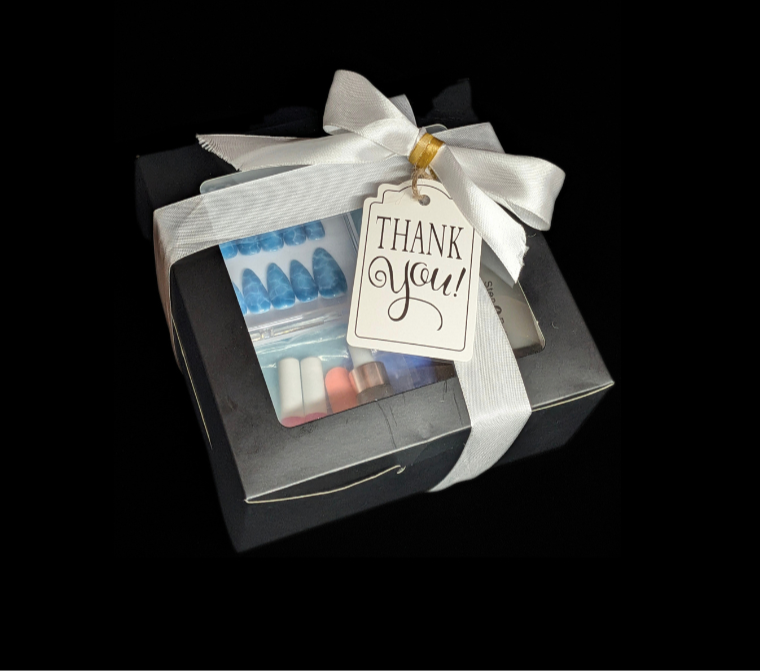


The perfect gift, wrapped and ready.
Each Gift Box includes one Rosebud Manicures press-on nail set and a Large DIY Application Kit, beautifully packaged for a gift that's ready to give the moment it arrives.
How It Works
1. Choose Your Nails
Add your desired press-on nail set(s) to your cart.
2. Select a Gift Box
Using the options menu, choose which nail set from your cart you'd like packaged inside this gift box.
3. Add to Cart
Add the gift box to your cart. To purchase multiple gift boxes simply repeat these steps for each gifted nail set.
What's Included
-
1 Press-On Nail Set (your selected design)
-
1 Large Application Kit
-
Premium gift box packaging
-
Decorative ribbon
-
Ready-to-gift presentation
-
Optional gift tags


Aftercare: For best results, avoid excessive hand use and water exposure for the first hour after application. With proper preparation and care, your manicure can last a week or longer. You can re-use these nail sets but filing or drilling the glue from under the nail then re-apply as desired.
How To Use Application Kits
1. Prep & Shape
-Remove any existing product from your natural nails.
-Shape nails to your desired length
-gently push back cuticles
-Remove any excess cuticle from the nail plate using the -cuticle remover or emery board.
2. Refine the Nail Surface
-Buff the natural nail using the buffer block or gently with the emery board to create the ideal foundation for adhesion.
3. Cleanse
-Remove all dust and debris using the alcohol wipe. Ensure the nail plate is completely clean, dry, and free of oils.
4. Size & Arrange
-Select the correct press-on nail for each finger and arrange them in order before beginning application.
5. Apply
-Apply a thin layer of nail glue to the back of the press-on and a small drop to the center of your natural nail.
-Align the press-on at the cuticle and press forward toward the tip. Hold firmly for 30 seconds.
6. Secure
-Remove any excess glue
-apply firm pressure for an additional 30 seconds.